Installing Mandriva 2006 Free Edition
Another screenshot time! As usual, I used my wife's Nokia 6600 camera phone for this. And as usual, I apologize for crappy pictures. Once I have the money to buy a decent digital camera, all would be better.
In the mean time.....
After the last Mandriva post, I decided to reinstall the Free Edition, document it, and use for future reference.
Let's move on.....
Before you could boot the CD, make sure you configure your BIOS to boot your CD-ROM/RW/R before your Hard Disk.
The screenshot below is my BIOS initializing (is that what you call it?). To access my BIOS, I have to hit the Delete Key. Other systems would require you to hit on F1 or Esc keys.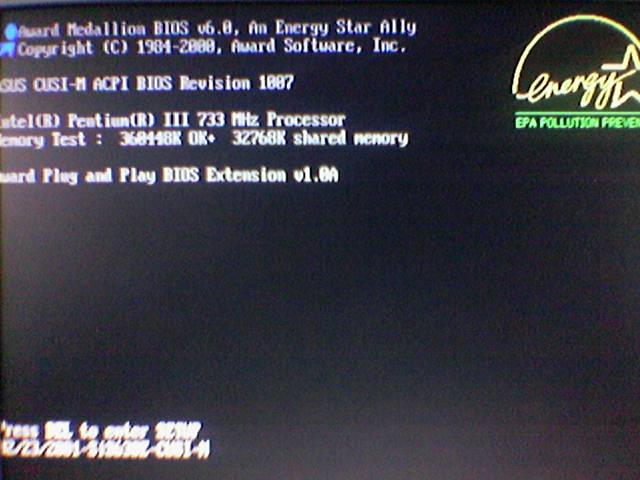
Once you're on the BIOS page, make sure you go to the Boot options.
Check your Boot Devices and the order they boot.
If you want your CD-ROM to boot first, highlight it then hit the negative/minus (-) positive/plus (+), or in my case the Page Up or Page Down keys on your keyboard.
Whatever you do, make sure you place the CD-ROM above the "Primary" Hard Drive.
Of course you have to save your configuration.
Once the Mandriva 2006 Free Edition CD 1 has booted up, you will see this screen.
Just hit the Enter key to start installing Mandriva
This screen indicates that the Mandriva installer is initializing. You'll the the progress bar at the bottom move to the right.
Now this is the first option the installer would let you choose.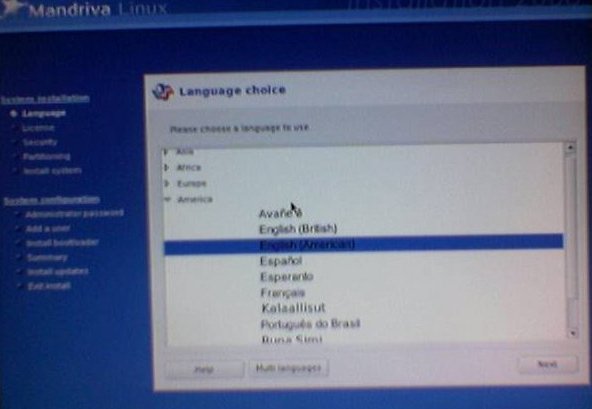
By the way, this is the progress indicator that'll be on the left pane of you screen.
This would show you how many more steps you have to go through before rebooting to your new OS.
This pane would be your companion while installing Mandriva So let's move on, the Language Choice options. I selected English (American) for this.
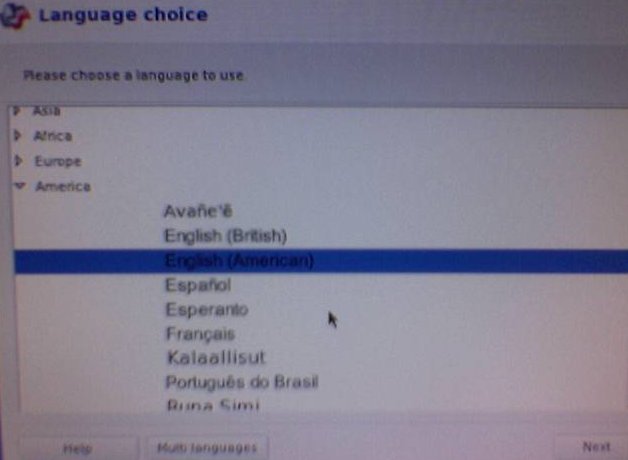
This is the License Agreement. It's like the EULA (End User License Agreement) in Windows but without the "you are renting Windows XP" clause.
After reading the License Agreement, make sure you select "Accept" before hitting the Next button.
Security options. This is the basic firewall and file/directory permission configuration.
I personally selected Standard. Why? Hehehehe! Because I won't need a High or Paranoid settings.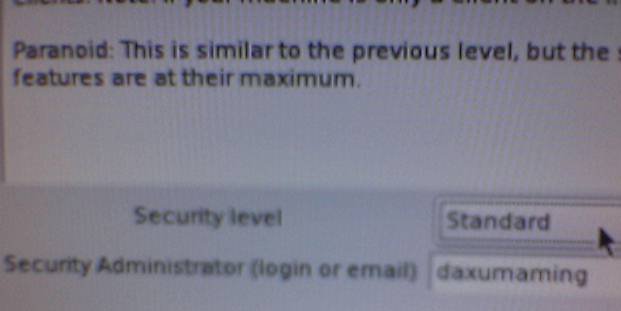
Here's the DrakX Partitioning Wizard.
I don't want Mandriva to take over my Hard Disk nor use the free space.
I'm a control freak, so I chose Custom Disk Partitioning, besides, I already deleted some partitions.
It's now time for DiskDrake.
I selected a blank partition (it's in white color) then clicked on the Create button at the bottom.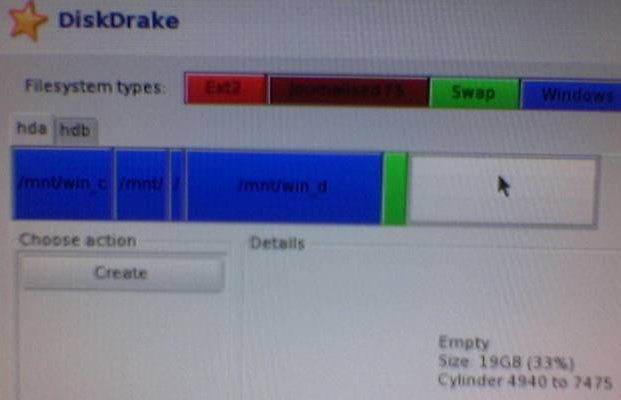
Then this the configuration. You could resize that partition, select a filesystem, and select a mount point.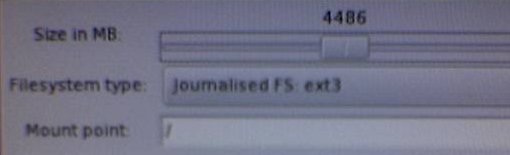
Once that's done, click on the Next button.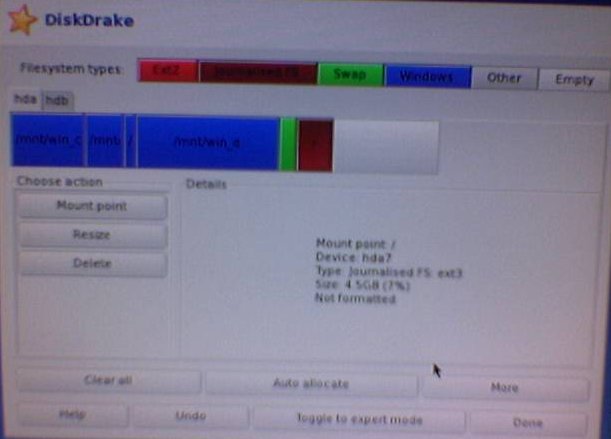
I really don't understand what this is for. But I guess it's for other apps in the CD, but this is useless 'coz you won't know anyway what's inside the cd.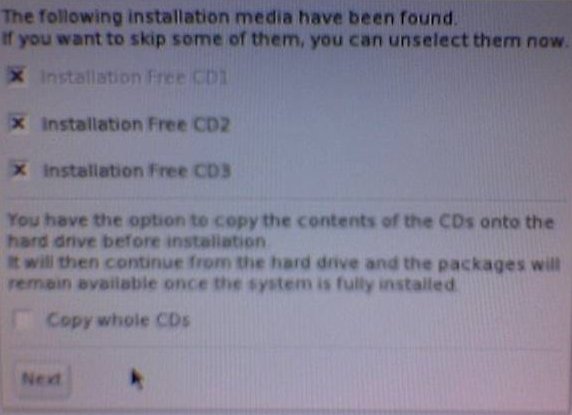
Next up would be addition source of updates (don't know what they call it) but in Debian, it's like the sources.list.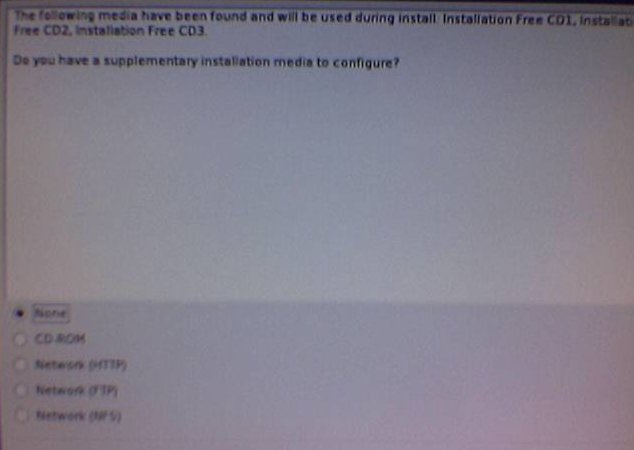
I didn't select HTTP or FTP since I like to know what apps (and it's versions) got installed by default.
Besides, I'm worried that Mandriva would tied up my bandwidth by downloading hundreds of megs of updates.
Package Group Selection
Close up of what packages are available.
Personal Preference: I installed everything listed under Workstation.
Hey, I'm a businessman, I'd rather use applications I use on a daily basis.
I love to use and experiment with different servers. But unfortunately, I'm behind a NAT (ISP Requirement) to save costs on acquiring IP Addresses.
So there it is, installing Mandriva on my PC. And while waiting for the installer to finish, I'm presented with this, er, images and advantages of using Mandriva.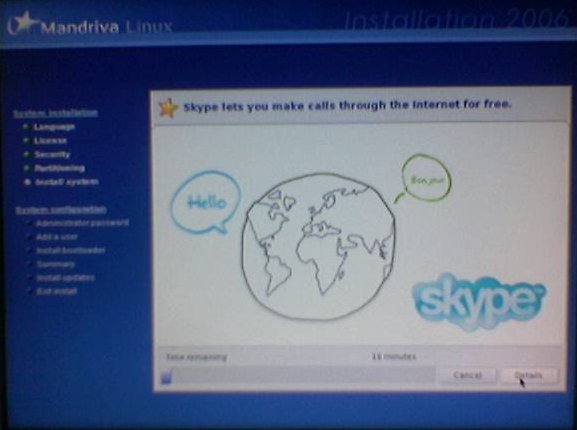
Like this image, Developer Tools for Linux from Intel? Never heard of it. Hey, isn't it that Intel teamed up with Microsoft in developing Hardware-based security so that Microsoft could easily enforce DRM and Trusted Computing? Yeah! I really doubt this!

After copying the files to your Hard Disk,
This is now a chance for you to create you user account.
You could also create multiple user accounts here.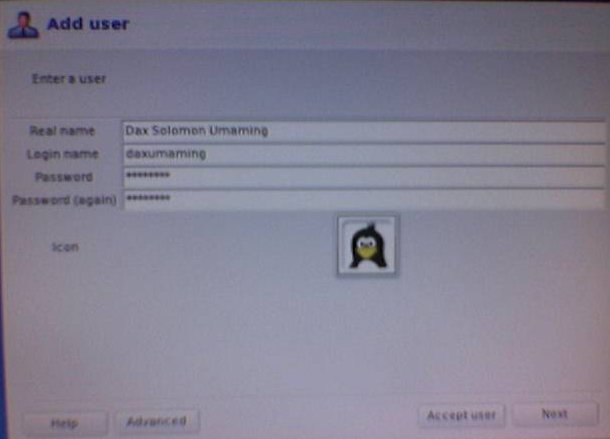
And of course, you could use the Autologin feature of Mandriva (actually it's available on all distros using KDE).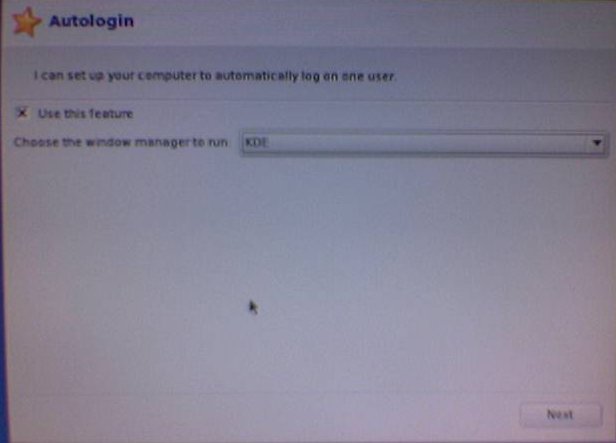
Bootloader installation
If you have an HP printer connected on your USB port, Mandriva would also auto-configure that for you, if you like it.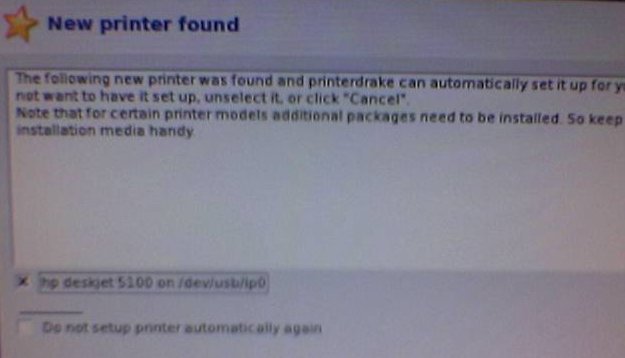
Another "Configuring your PC" progress bar.
And this is the Summary page, of course, you could still change your preferences here.
This is where I chose GRUB over LiLo
Once you click on the Next button, Mandriva would try to update your PC, this is the reason why I didn't want to add HTTP or FTP a while ago.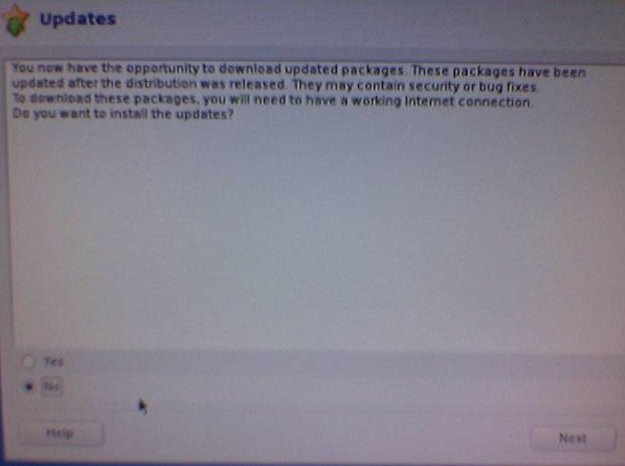
Congratulations page! You could now reboot your PC after taking out the Mandriva CD's.
I love using GRUB 'coz that's my first bootloader in Linux. Besides, it's much easier to configure.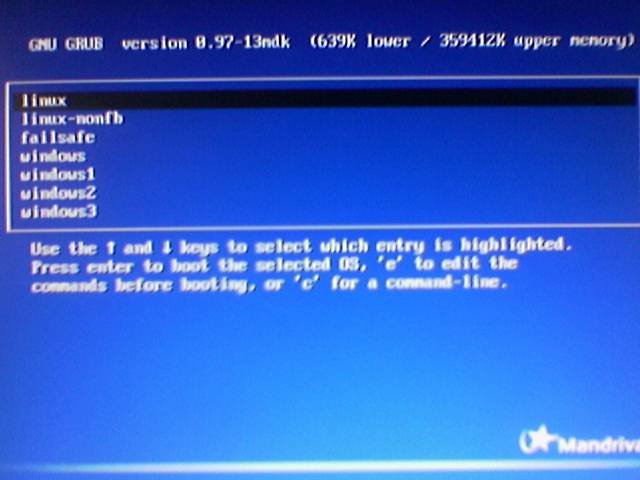

Once Mandriva booted up, I was a bit surprised to see this since I didn't encounter this survey on my first install.
I tried answering it.
It's just a survey anyway.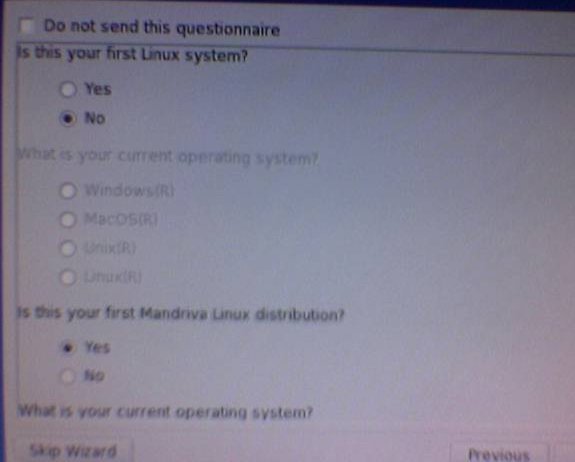
This is where I messed up. After I selected "No, thanks" and hit Next, it didn't finish the survey, instead, it booted back to normal.
![]()